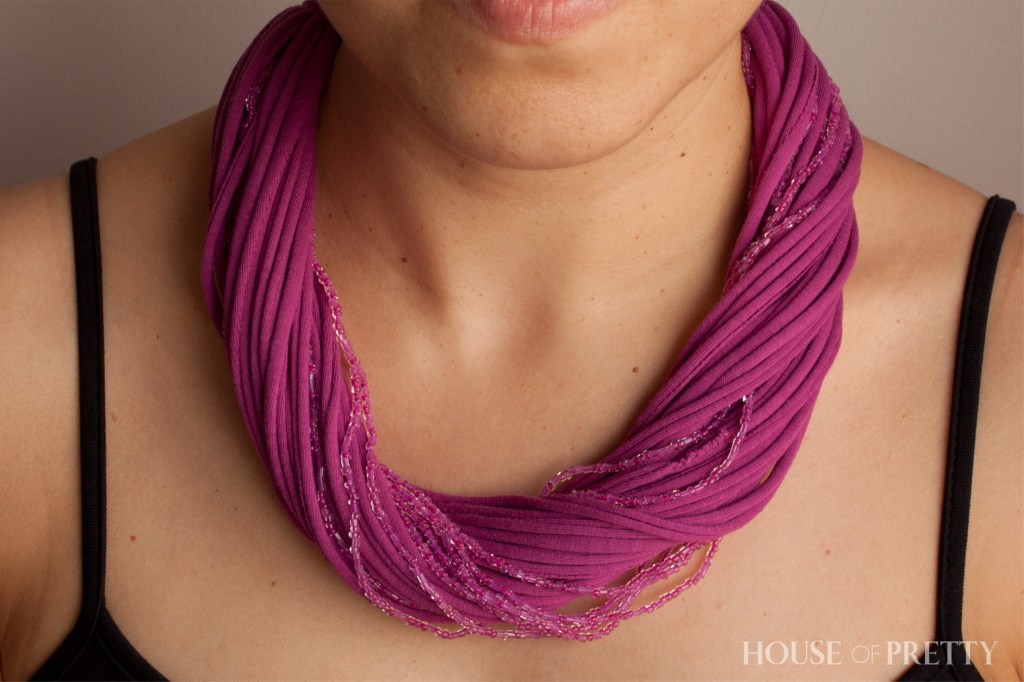
Transform old t-shirts into unique necklaces (🇵🇹 & 🇬🇧)
🇵🇹 Ponto de partida para este projeto: Uma t-shirt velha e um fio de missangas da mesma cor (ou não, e preferir algum contraste! :))
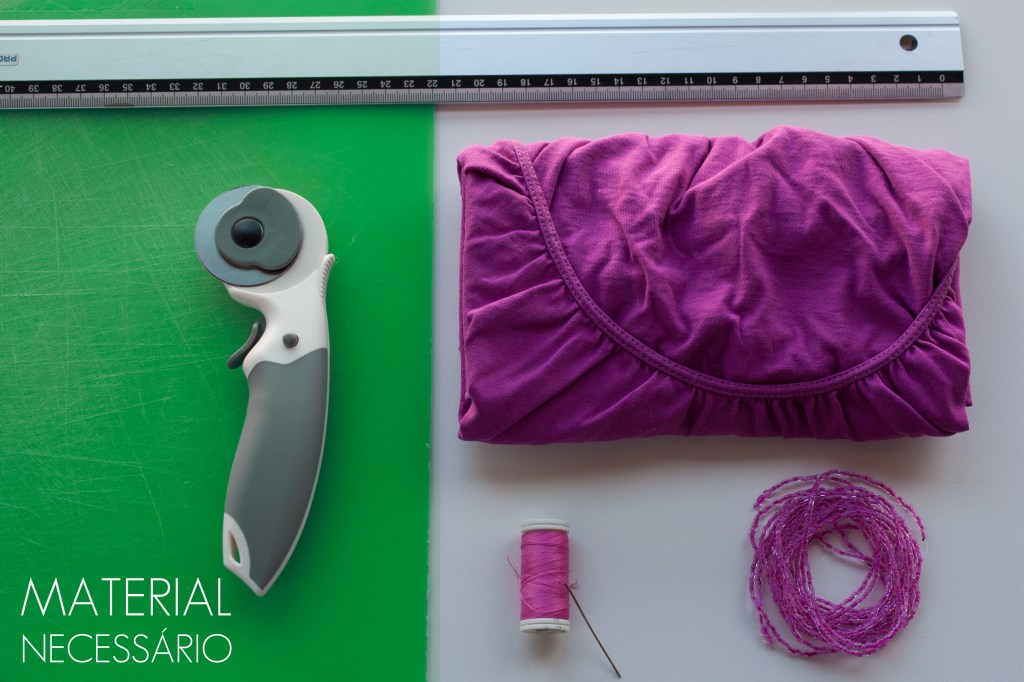
Material necessário:
- Cortador rotativo
- Régua de metal
- T-shirt velha
- Linha
- Fio de missangas
Instruções:
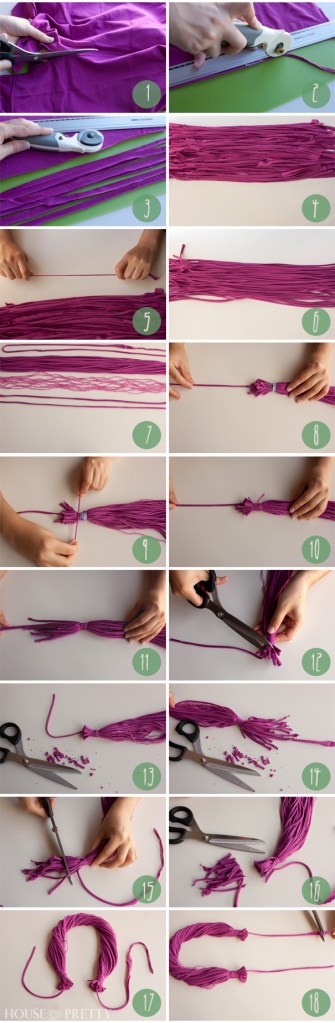
Nota: os números de cada passo estão ilustrados na fotografia imediatamente a seguir às instruções.
1.º Corte a t-shirt retirando todas as costuras, deixando apenas a frente e as costas.
2.º Corte toda a frente e as costas em tiras finas (máximo de 1 cm, idealmente menos) ao longo do lado mais comprido, garantindo que uma tira é mais comprida do que todas as outras. Um cortador rotativo facilita e agiliza esta tarefa, mas uma tesoura comum também funciona (não se preocupe com as imperfeições; elas darão charme à peça).
3.º Depois de cortar todo o tecido em tiras…
4.º …terá uma pilha de tiras prontas para o próximo passo.
5.º Pegue em cada tira e estique-a, uma de cada vez. Um puxão firme é suficiente…
6.º …para transformar as tiras planas originais em tiras ligeiramente curvadas.
7.º Separe a tira mais comprida e duas tiras de tamanho normal. Junte as restantes tiras de tecido juntamente com o(s) fio(s) de missangas, certificando-se de que a tira mais comprida fica no centro do feixe. As duas tiras extra serão utilizadas na próxima etapa.
8/9.º Usando uma das tiras extra, ate uma das extremidades do feixe de tiras de tecido com missangas (pode usar um elástico primeiro para facilitar). Simplesmente enrole-o várias vezes e dê dois nós firmes na ponta…
10.º … para que fique assim!
11.º Repita os passos 8, 9 e 10 do outro lado.
12/13.º Apare as pontas para criar um aspeto mais uniforme (tendo cuidado para não cortar a tira mais comprida).
14/15/16.º Repita o passo 12/13 na outra extremidade.
17.º Depois disso, a tira mais comprida ficará em destaque.
18.º Apare as extremidades da tira mais comprida, deixando espaço suficiente para atar o colar ao pescoço (teste antes de cortar).
19.º E pronto! Para um toque final especial, torça os fios de tecido e de missangas juntos para melhor combinar os diferentes materiais.
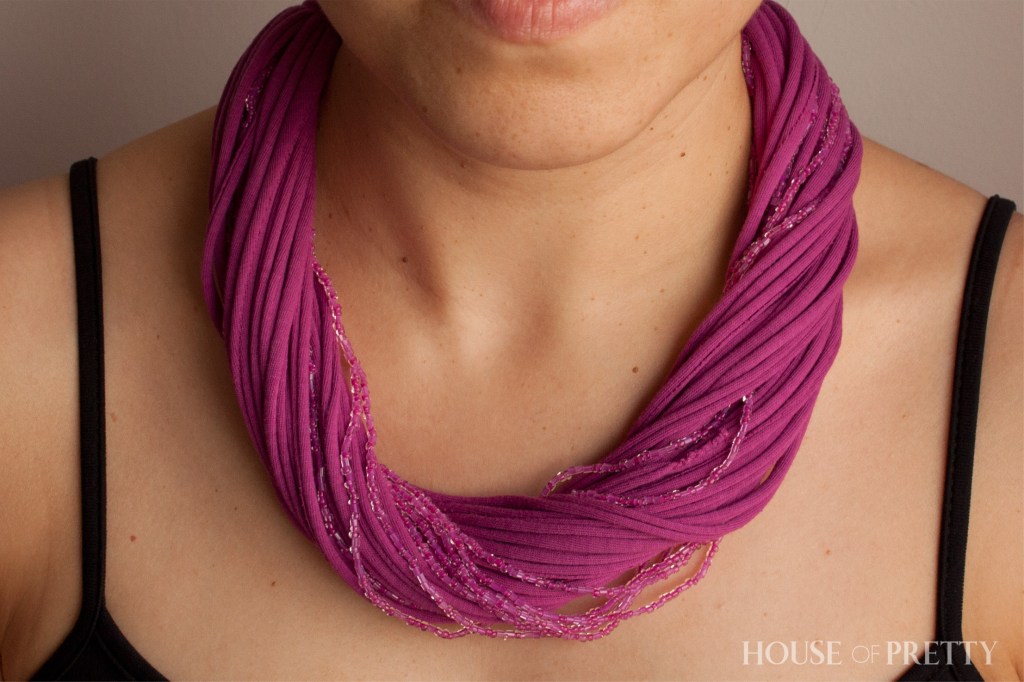
🇬🇧 Starting Point: An old t-shirt and a string of beads in the same color (or not! :))
Materials needed:
- Rotary cutter
- Metal ruler
- Old t-shirt
- Thread
- Beaded string
Instructions:
1. Cut the t-shirt to remove all seams, leaving only the front and back.
2. Cut the entire front and back into thin strips (max 1 cm, ideally less) along the longer side, ensuring that one strip is longer than the others. A rotary cutter makes this task easier and faster, but regular scissors will work just as well (don’t worry about imperfections; they will add charm to the piece).
3. Once all the fabric has been cut into strips……
4. …you will have a pile of strips ready for the next step.
5. Take each strip and stretch it, one by one. A firm pull is enough…
6. … to transform the original flat strips into slightly curled ones.
7. Set aside the longest strip and two regular-sized strips. Gather the remaining fabric strips along with the beaded string(s), ensuring that the longest strip is in the center of the bundle. The two extra strips will be used in the next step.
8/9. Using one of the extra strips, tie one end of the bundle of fabric strips + beads (you can first use an elastic band to make it easier). Simply wrap it around several times and tie two tight knots at the end…
10. … so that it looks like this!
11. Repeat steps 8, 9, and 10 on the other side.u
12/13. Trim the ends to create a more uniform look (being careful not to cut the longest strip).
14/15/16. Repeat step 12/13 on the other end.
17. After this, the longest strip will stand out.
18. Trim the ends of the longest strip, leaving enough space to tie the necklace around your neck (test before cutting).
19. And you’re done! For a special finishing touch, twist the fabric and bead strands together to better blend the different materials.
Materials needed:



Leave a Reply